The University of Minnesota Golden Gophers received a new addition to their sports complex last winter called Athletes Village. Three new buildings combined to create a 338,000-square-foot (31,401.2 m2) complex. There’s a nutrition center, film room, indoor practice area, and more. Along with the Gibson-Nagurski Football Complex and Bierman Field Athletic Building, it’s everything that Big Ten, Division 1 student athletes could ever want! And it took a specialty coatings crew from nearby Newport, Minnesota, to help them cross the finish line.
Just as a Golden Gopher team would, the crew from EDC Install Solutions had to work together — internally and externally. They had three to five crew members, depending on the task, with Principal Eric Chamberlin as the captain. And they worked for not one or two but four different clients — Mortenson Construction, which was the general contractor, as well as three separate subs — on various flooring projects. Those included polishing one area, prepping another, and tying the kitchen into an existing third area.
Coordination was key. As to how Chamberlin gets that done: “Beg, borrow, and steal opportunities,” he said succinctly. “I just work hand and hand with everybody and try to facilitate the best outcome, but it’s not always easy. Everybody’s kind of under pressure. That’s kind of my scope, that’s why I jokingly call myself the fixer, because I come in when everybody’s under pressure and try to solve the problem.”
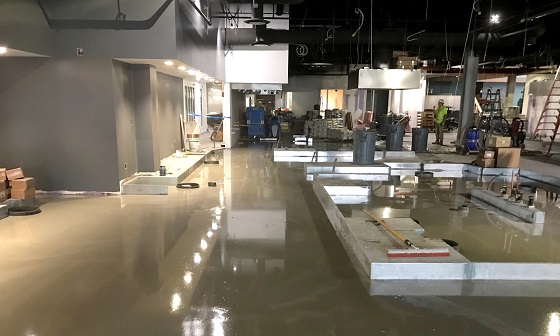
The 5,000-square-foot (464.5 m2) kitchen area, in particular, required a bit of finessing from EDC. But this type of fix-it work is just what Chamberlin, who’s on site for every one of their projects, prides himself in. It’s clearly paying off. They started the overall project on a wood floor area, but their scope expanded as time progressed. For this kitchen portion, “Essentially it was just another area to fix,” he said.
Despite being a new build, the concrete in the kitchen area had a grade mistake with curving where the appliances would go. That area needed to be leveled and graded before another sub could come in and install tiles. They were brought in by the concrete placement company. “I was brought in as the fixer,” he reiterated.
Underlayment Overboard
The EDC crew began by protecting any finished surfaces and designating their work areas, especially when surface prep was going on and silica issues could come into play. That potentially occurs during shot blasting of the concrete, which is completed in three separate small phases. To prep, they used a Streamer machine from a German company called IMPACTS.
 Due to those Occupational Safety and Health Administration (OSHA) silica standards, the crew was sure to wear high-efficiency air particulate (HEPA) filter masks and other standard personal protective equipment (PPE) while prepping the floor. They also used air systems for purification in the tight spaces.
Chamberlin says he goes a little bit “overboard” here because he’s determined “not to have issues” on his end. That means they shot blast to an International Concrete Repair Institute (ICRI) Concrete Surface Profile (CSP) 4–5. But they’re “pretty efficient,” so it took only a day to prep and prime each section.
That same day, the crew laid out the primer. That was W. R. Meadows’ REZI-WELD, which was poured out from a MEGA HIPPO, squeegeed, and backrolled “like a normal epoxy,” according to Chamberlin. They applied that at 12 to 15 mils (304.8–381.0 microns) and broadcast 40/80 mesh sand into the wet coating. “Although we are creating a profile that’s very aggressive, I also want to give it more opportunity for a mechanical bond so that’s what that broadcast does. It locks into the resin and helps for the transition points, or mechanical bond points, for the underlayment,” he explained.
Laser Focus
The next morning, the crew came in to finish the system. The day started by cleaning up any remaining aggregate that wasn’t cured into the primer.
Then, working with temporary lights since the area wasn’t complete yet, they’d set up their mixing stations. A silver lining of a small work space is that the mixing station was near the materials on the pallet, including their water source and buckets, as well as the work area on the floor. Thus, they didn’t have too far to travel. They had to hand mix due to the size of the room, though — otherwise, they would have been using pumps.
Before installing the topcoat, W. R. Meadows’ FLOOR-TOP STG, Chamberlin used a laser to get target points for the self-leveling materials. “It’s just visible help,” he said. “So if we have an area that’s a 1 3/8ths [3.5 cm] low and 10 feet [3.1 m] from that it’s a 1 1/4 [3.2 cm] low… it’s hard to see that with just the naked eye sometimes, especially in that situation where it was pretty dark. So by having a target there, we know that we’re going to have a little more material placement there so we’re going to be prepared to add more,” he continued
After setting up, the crew used caulking on any migration points or leaks “to make sure we’re not going to lose materials into areas like floor drains or any type of peripheral problem spots,” Chamberlin explained.
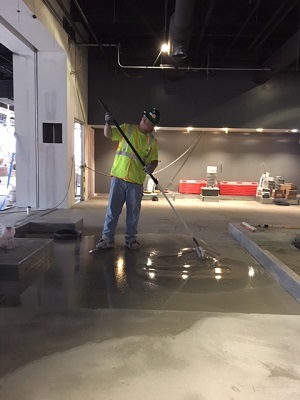
Then it was time to put the team in motion. Each crew member worked one particular task: mixing, prepping bags and water, running material and prepping the mixer, placing the material, and squeegeeing it out. They mixed three bags at a time to get the underlayment out. That’s about 100 bags an hour, covering only two hours of work start to finish! “After placement, we’d come in and make sure all our stuff was cleaned up and start on the next area,” Chamberlin said.
In the end, they were within 1/8th (0.3 cm) inch on that full floor area for grade. Talk about a fix!
Mr. Fix It
Chamberlin said the crew he worked with on this project were “well trained and worked hard.” But, unfortunately, they’ve moved on to other teams since this job was completed early last year. Chamberlin’s taking his fixing skills on the road, too. He’s opening up a new location in Florida to “grow a bit in different areas,” he said.
In the meantime, Chamberlin continues to work with the products from W. R. Meadows, which he called “flexible and user-friendly.” On a week-long job, that can make all the difference. And it was certainly a job that Chamberlin wanted to do right. “It was a great project,” he said. “It was pretty high profile. The GC’s pretty well known and highly regarded, so it was exciting to be involved with it because of how high profile it was.”