Usually, a call at the end of the day on Friday doesn’t mean good news, but for PennCoat Inc., a coating contracting firm located near Lancaster, Pennsylvania, picking up the phone was profitable yet pressing.
They'd just found out at they won a bid for a new facility floor from an existing client and had to hit the ground running three days later. For Jeff Neal, a project manager for PennCoat, that meant there was no TGIF that week! “I came in on the weekend to put the job folder together, and we had to get our crew lined up Friday evening/Saturday,” he said.
The client, which wishes to remain unnamed, was opening a new warehouse that was to use fork lifts, and those lifts would need to be charged. A battery charging station equals battery acid. And so the next logical step was to install a protective coating system on the new concrete floor.
There was 11,760 square feet (1,092.5 m²) of floor to cover, safety training to get on the books, and a deadline to meet. “There were a lot moving parts, but they wanted to get the floor done,” Neal continued.
Room to Grow
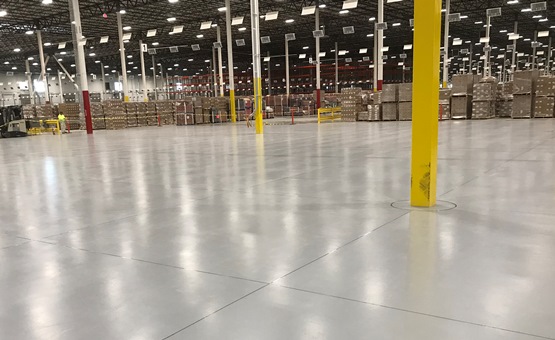
The charging station, which was 112 feet by 105 feet (34.1 m x 32.0 m), was located in the wide open facility. It was an active jobsite so little was necessary from the PennCoat crew in the way of hanging containment or covering inventory. “This warehouse was so large that the battery charging area was off on its own like a little island almost,” Neal said. “And we really had our own area to ourselves. There was no shortage of space.”
That made the surface prep fairly straightforward. Six crewmembers from PennCoat took about two and a half days to shot blast the floor using not one but two Blastrac machines. Wearing dust masks, ear plugs, safety glasses, and yellow safety vests, the crew completed this step not only to create a profile on the new concrete but also to cut through the seal and clean it.
Using a hand grinder, the crew worked around columns and edges. And they also keyed any areas where the new system would transition into the existing floor. Neal said that floors are normally keyed in about 1/4th inch (0.6 cm) but because the coating system wasn’t going to be that thick, they didn’t need that on this job. What they needed was “a little nip in the floor just so the material could anchor into it.” That equated to keying in only about 1/8th inch (0.3 cm).
Though easier for prep, the size of the room also brought in a challenge for the PennCoat crew. Neal was nervous to install a seamless coating system on the floor without any control joints, but he had a plan. “If we tried installing a seamless floor, I figured it would probably crack ’cause the building is still pretty new; so I figured there’d still be settling going down,” he explained. “I thought it might be a good idea to install some joints into it, but you can’t install your joints before you put your floor in. You have to do it after you put your floor in.”
Therefore, during the prep stage is also when the crew installed nails to mark where the joints would be put in after the coating system was applied.
To the Top
Although not a copper top, the newly prepped concrete was topped with a protective epoxy system. Again, because of the size of the floor, the crew had to tailor the process. That started with two pours of the cementitious urethane instead of the typical single pour. Because cementitious urethane heats up and outgasses, without a broadcast in it a thicker floor could have bubbled. The broadcast “pops the bubbles, otherwise you can get little volcanoes showing up on top,” Neal explained.
But this wasn’t a broadcast floor; it was supposed to be smooth. That meant the crew laid out the total average thickness of 1/8th inch (0.3 cm) in two 1/16th inch (0.15 cm) layers to minimize the outgassing. They used Hippo mixers, Wooster loop rollers, and a rake to evenly spread out the cementitious urethane, Dur-A-Flex’s Poly-Crete SL.
Before installing the epoxy coat, the crew profiled the cementitious urethane with a light grind using a Prep/Master. “It’s not like a heavy grind like you do on a concrete slab...it might take half as long to do this grind,” Neal explained. Onto that profiled layer, the crew rolled and raked the epoxy, Dur-A-Glaze #4, tinted medium gray, to achieve an average of 16 wet mils (406.4 microns).
Three crew members, as opposed to the normal two, rolled out the epoxy: “The first guy is spreading it out, then you have, with this job, two support guys cross-rolling it,” Neal said.
And then the crew applied the final layer, a clear ultraviolet (UV) stable urethane called Armor-Top, to achieve an average of 3 wet mils (76.2 microns). They mixed aluminum oxide powder into the liquid to help keep the floor resistant toward the battery acids.
The crew wore spiked shoes throughout the job. And they used a day to install each layer of the coating system, allowing each layer to cure overnight before starting on the next step in the build of layers.
Connecting the Dots
With the crew powered up to 12 members, it was time to hit the busiest part of the project. Remember those nails from earlier? This is when they really come into play.
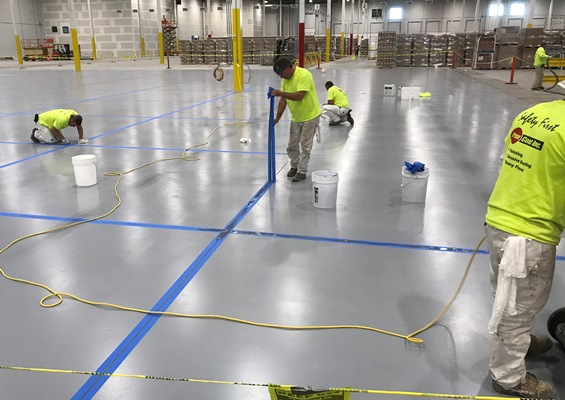
Once the topcoat cured, the crew ran chalk lines between each nail popping out of the top of the system. With a snap of the string, they marked where they needed to saw-cut the joints. With the cuts done, they doubled back with blue painters tape before filling the joints with a polyurea material.
Seven crew members put down the polyurea with a dispenser and “slicked” it back into the crack. According to Neal, that process is similar to using a spatula and is used rather than a razor to avoid scuffing up the newly installed coating.
Four other crewmembers went around pulling up the tape before the polyurea could set. “Because it sets so fast, you need a lot of guys on it,” Neal explained. As the Energizer Bunny said, “It keeps going and going and going.” In total, the crew covered 2,000 linear feet (609.6 m) of saw-cut and filled joints.
After two weeks, the PennCoat crew was able to return a new chemical-resistant floor to the client. They met the schedule to allow for the electricians to come in and get the warehouse on line, continuing the positive relationship between them and client.
“It was a tough job, but as far as accommodations go it wasn’t tough to work there,” Neal said. In fact, Neal said the biggest challenge was the quick start, but the crew met it head on. “We had to hustle,” he said succinctly. “But it worked out.”