How many times have flooring contractors installed a rigid resinous polymer flooring system just to get a call back months later stating that the floor has cracked? The rule governing this behavior is the “who touched it last” rule, which means — “if you coated it, you accepted it!”
Crack issues can be a common experience in the flooring business. So what information should be gathered and documented to keep the responsibility where it belongs and what information should be collected to demonstrate who is really responsible when a crack appears after the coating or overlay has been installed?
Concrete Cracks
Concrete is by far the most common structural substrate on which resinous flooring materials are applied. Concrete, in its most basic description, is a mixture of cement, various grades and sizes of aggregate, and water. While the makeup of concrete is basic in design, the proper placement, curing, and drying of concrete is an extremely complex process requiring a high degree of expertise.
There are many different mix designs that are used to modify the performance and physical characteristics of concrete. Each of these designs have pros and cons, but as a general rule, factors that contribute to the amount of concrete cracking include add-mixtures, weather conditions, proper grade selection and compaction, water-to-cement ratios, moisture barriers, proper curing and drying of the concrete, proper layout and cutting of contraction joints (often referred to as control joints), and overloading the slab. The fact is, there is no way to absolutely predict when and exactly where the concrete will crack. So what can a flooring contractor do to avoid problems with the concrete cracking?

Know Thy Cracks!
Concrete cracks for many reasons. Some of the most common reasons are as follows:
1. Cracking Due to Corrosion. The corrosion of reinforcing rebar and other embedded metals is a major cause of cracking in concrete. As reinforcing steel corrodes, it expands. That creates internal forces that eventually overcome the tensile strength of the concrete, resulting in cracking and other concrete surface failures. Often rust can be seen at the surface and can be a help in quickly identifying this type of cracking.
2. Expansion Cracks. As with many materials, concrete will expand exponentially as it gets hotter. This expansion can cause immense stress on a concrete floor. As the concrete expands, it pushes against all obstacles in its way. When it comes against an unmovable object, such as another concrete floor, the weaker of the two obstacles will be forced to crack. Designers plan for this by placing expansion joint material, such as foam, asphalt, and cork, at the interface between the concrete floor and walls, columns, and other structural components.
3. Loss of Subbase Support. This is most often caused when the subbase is washed-out or settles from its original compacted state, causing an implosion of the concrete slab. Although it is most commonly seen in older slabs, it can be seen in new construction when the concrete form work has been removed too early in the curing stage.
4. Thermal Cracks. Thermal cracks are caused when the temperature increases in the interior portions of the concrete, causing it to expand, while the outside surface of the concrete is cooling, causing it to contract. When the temperature differential between the interior and exterior is too great, consequential tensile stresses can cause thermal cracks at the surface. This kind of cracking is usually seen when concrete is in mass, but it can also be found in thicker concrete floor pours.
5. Crazing Cracks. Crazing cracks are very common and exhibit themselves as small pattern cracks occurring in a floor slab surface. They are caused when the surface of the concrete floor dries earlier than the underlying concrete. These cracks are usually smaller than 1/8‒1/4-inch (3.2‒6.4 mm) deep and are usually not detrimental to the performance of the concrete.
6. Plastic Shrinkage Cracks. Plastic shrinkage cracks are caused when moisture evaporates faster from the surface of newly poured concrete, and then bleed water comes to the surface to replace the evaporated water. Low humidity, elevated temperatures, and high winds can all play a part in drying out the top of a concrete slab. As the top of the slab dries, it begins to shrink. The underlying concrete, still wet, restrains this shrinkage, causing tensile stress to develop in the weak uppermost part of the concrete surface. This results in shallow cracks of varying depths. These cracks usually run parallel with each other about 1‒3 feet (30.5‒91.4 cm) apart and can be fairly wide at the surface. Normally, they are a cosmetic defect, and if repaired, they are not detrimental to the performance of the concrete floor.
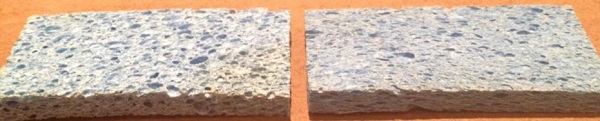
7. Drying Shrinkage Cracks. Concrete, in its plastic state, gains volume due to the exothermic hydration reaction of cement and the reaction of calcium sulfate and calcium aluminate to form calcium sulfoaluminate. This gain in volume occurs within the first few hours after mixing with water. As the concrete loses moisture and begins to harden, it loses volume and acts much like a wet sponge as it dries (see figures 1 and 2). When shrinkage is restrained by its contact with the subbase, surrounding structural components, such as walls, columns, steel reinforcement within the concrete, and piping in and through the concrete, tensile stress is developed within the concrete itself. Concrete, while being strong in compressive strengths, is weak in tensile strength (approximately 10 percent of its compressive strength) and this weakness is greatly tested as the concrete shrinks and literally pulls itself apart. The result is cracking of the concrete at its weakest points. Designers plan for this by specifying contraction joints at intervals spaced at distances equal to 24 to 30 times the slab thickness and in areas such as re-entrant corners. To be effective in controlling shrinkage cracks, joints must be troweled into the plastic concrete, or cut to a minimum depth of 25 percent of the actual slab thickness before the concrete has already cracked. Usually, this is as soon as it can be walked on without damaging the finish and almost always before 24 hours of placement. Failure to properly weaken the plane at the proper time can result in cracking alongside the planned joint or at random locations.
Information Is Key
The first step in protecting your bottom line is to do your homework. ACI 302 and ACI360R-10: Guide to Design of Slabs-on-Ground provide a plethora of information and outline the most current recommendations for constructing concrete floors and slabs. These documents most likely governed the placement of the concrete that you have been hired to coat. Understanding what should and should not have been done when the concrete was placed is extremely important to your success.
This is the first article from Chris O’Brien regarding concrete repair and coatings. To read the second article, called “Cracking the Code on Concrete Repair” click here.
About the Author:
Chris O’Brien, president and CEO of Rock-Tred Corporation, has worked with specification writers, architects, building consultants, general contractors, facility managers, and business owners over the past 25 years to design and execute coating and overlay projects that beautify and protect. For more information, contact: Rock-Tred, (888) 762-5873, www.rocktred.com